Imagine being out camping, and then it suddenly starts raining. Or maybe it is summer, and you’re out basking under the sun. Or let’s say, you’re having one of those random night outs staring at the stars, feeling adjoined with the nature. You certainly don’t want anything to come between you and the fun you’re having.
So why NOT set up a tarp? And what easier way is there to do it than to get it set up on a ridgeline?
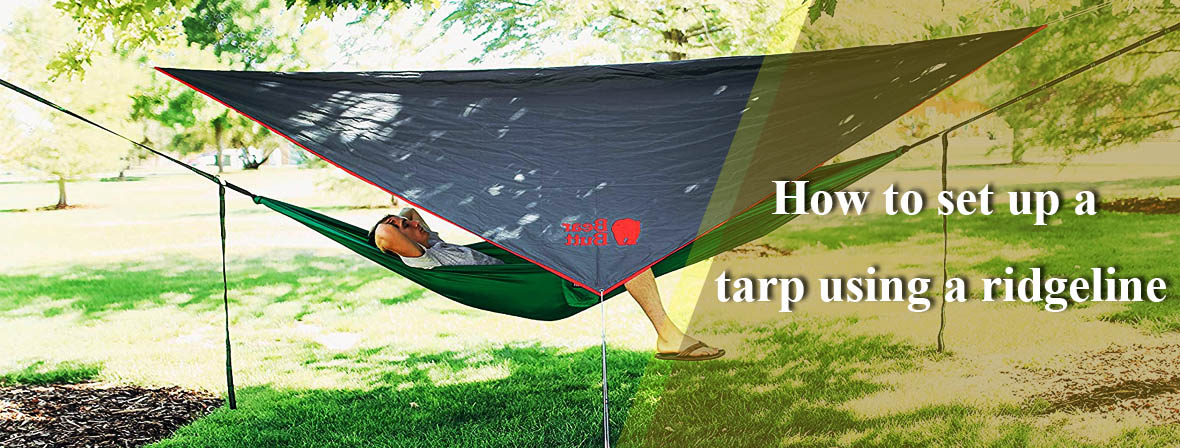
Whether you’re putting some extra cover over your tent, using a hammock or setting up a picnic table, there’re so many reasons why anyone would want to learn how to set up a tarp using a ridgeline.
In quick mentions, a tarp is one of the handiest and versatile bits of kits a serious camper would never want to miss in their toolkit. It’s also lighter compared to a full tent. That’s besides going up super fast just in case you’re caught in an unexpected downpour … and the list continues.
Read : Best Beach Sunshade
So why a Ridgeline
Of course there are so many ways to set up a tarp. What dictates the method you choose is what’s technically available at the time of setting it up.
But why would anyone want to use a ridgeline instead?
Simple, setting up a tarp on a ridgeline is super simple, provided your tarp has some riser attachment points. It also requires the least number of hardware and can nicely fit over your hammock.
What you’ll need?
Setting Up the Tarp Using a Ridgeline
The ridgeline you make should be about the same height as the tarp you plan to set up. Think of the ridgeline as the peak of your tarp roof.
To create the peak, you’ll begin by suspending a rope high on a tree. The tree you choose to tie your ridgeline should be strong enough to support the vertical weight of your tarp and every single one of the accessories it comes with.
It’s NOT necessarily a must for the tree you choose to hold all the tension placed on the rope, considering you’re still allowed to tie off the rope to a different tree.

Start by identifying the tree to tie your rope into a ridgeline. For the best possible results, it’s advisable to identity two trees that lie at opposite sides of your campsite. In other words, the trees must be arranged such that they’ll be forming a line and an in-between space that you’ll be covering with a tarp.
Once you’ve identified the trees to tie the rope, you can go ahead and throw your ridgeline rope over the branch of the trees. Make sure the rope is tied to branches that are closer to each of the tree trunks. This is important as it allows the tree to support more tarp weight compared to if you were to tie the rope at the end of the branches.
The next step would be to pull the ridgeline ropes by the ends to create space for suspending the tarp. All you have to do is find the biners at the end of the tarp and slide the rope to position them. This is much easier compared to supporting the tarp weight while adjusting it.
Once you’re done positioning the rope, you can go ahead and tie off the ends of the ropes to their corresponding tree trunks. Pull back the rope into the trunk for a taut ridgeline.
Next, set the rope loose by releasing it by the unsecured ends. And just in case you’re planning on using an extension, you can go ahead and pass a lightweight rope through the center biners.
You’re now allowed to spread out the tarp while positioning it over the rope as it lies on the ground.
Now try pulling the ridgeline by its end to hoist up the tarp. You can attach the biners to the loop as you pass the end of any of the ropes to a different tree and then back to the biners. This allows you to pull the ridgeline pretty tight.

Once you’re done suspending the ridgeline and the tarp, you can go ahead and attach the rope corners using bowline knots and a cow hitch. It’s also important to make sure that all the other ends are fastened using the same adjustable technique as the ridgeline.
It’s a Wrap
Setting the tarp should take you approximately 20 minutes, and when done right you’re certainly going to love it. As soon as is starts to rain or find yourself yearning for a shelter against the scotching sun, you can always reach out for this simple guide and use it to erect your tarp unit and relax under it.
Also Read:
1.Best Air Mattresses for Camping
2. Best Sit On Top Kayak